In this lesson we'll create a new Rails application using Rails 7. This lesson assumes you have both Ruby and Rails installed on your computer.
Begin by opening up a new terminal and running the following command from a directory where you'd like to store your projects. For me this is the Dev directory under my home user.
Begin by opening up a new terminal and running the following command from a directory where you'd like to store your projects. For me this is the Dev directory under my home user.
rails new RailsBeginnerApp
This will create our new Rails application and run the bundler to install all the ruby gems we need to run the application.
Next cd into the newly created RailsBeginnerApp directory and run the following command:
rails s
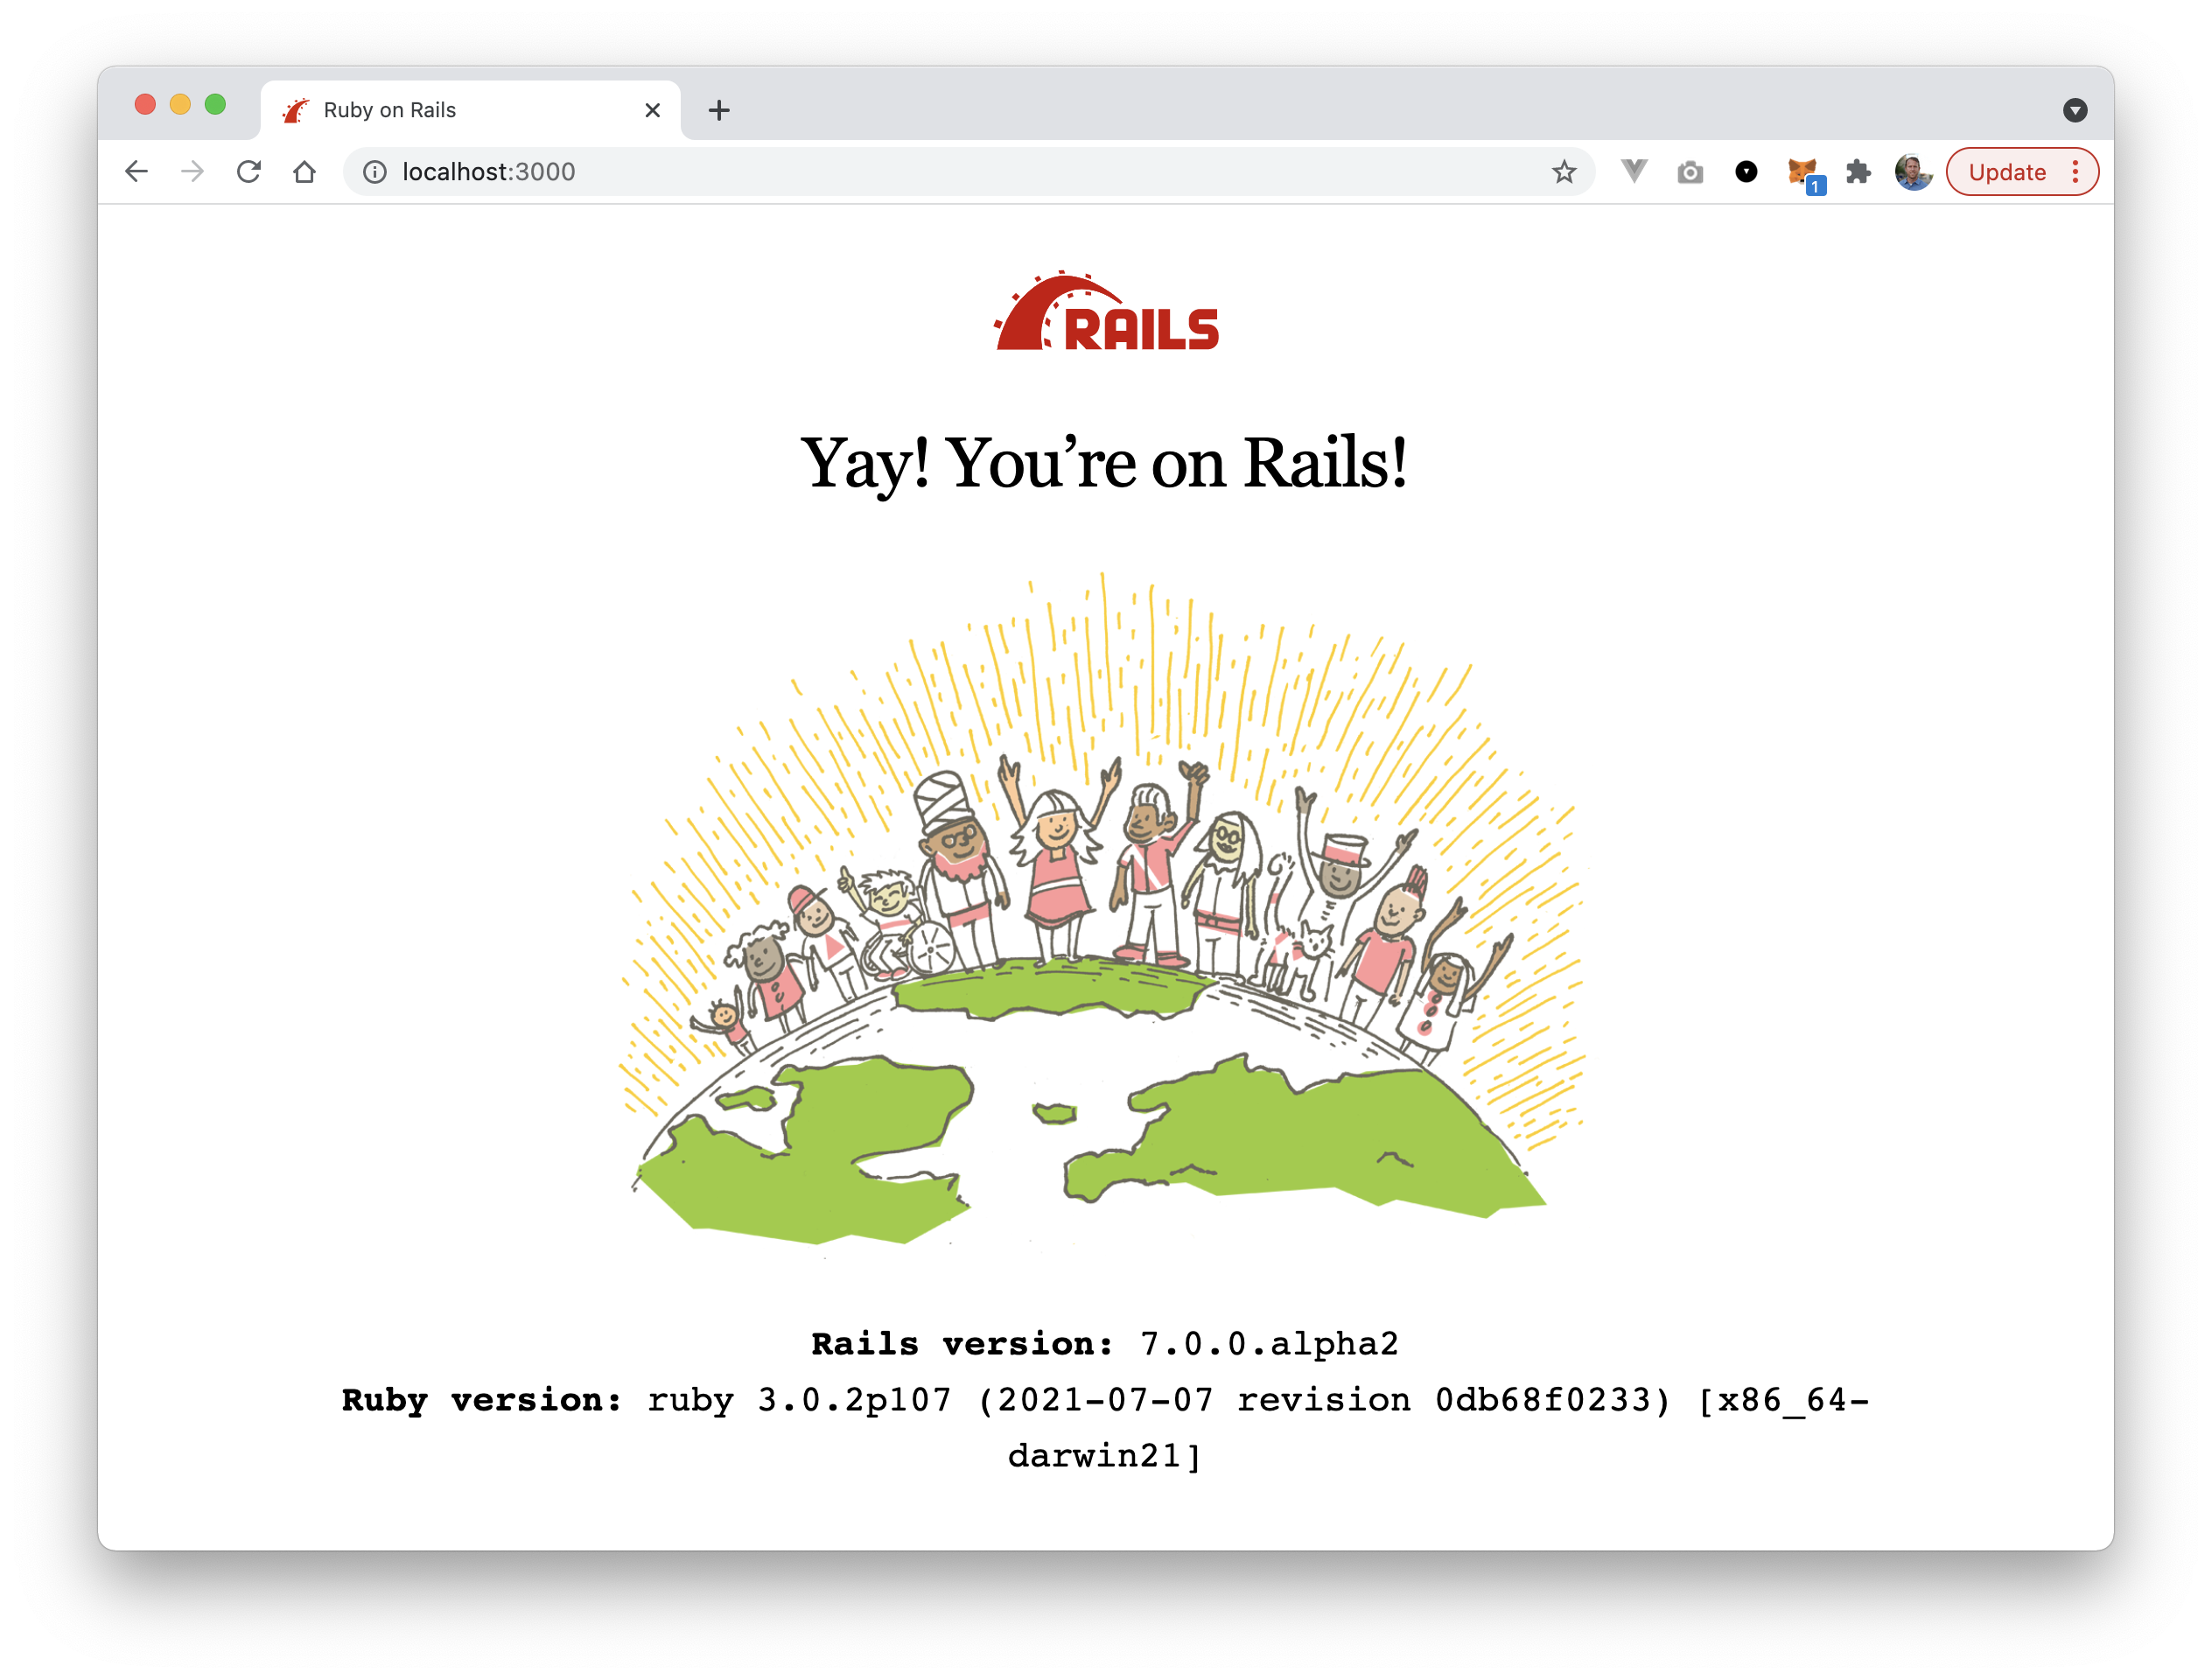
This starts our Rails server running on the default port which is 3000 for rails. You can now open the application at this url: http://localhost:3000
You should see this screen when opening your browser to the URL above:
Next let's generate a controller and view for the root page of our new Rails 7 application. From the command line within your project directly run this command:
rails g controller Static index
This will create a controller that will receive requests from the browser and the view that will make up the response to the browser. After running this command you can now see the new page you created at http://localhost:3000/static/index.
Now let's update the routes to tell Rails to use this view as our root view. Inside the config/routes.rb file add the following line:
root to: 'static#index'
This tells Rails to load this view at the root of the web application.
Now let's update our view to add Bootstrap CSS with just a modicum of content.
Start by going to the the intro page for Bootstrap. Copy the CSS link into the head element of your application.html.erb file (found in views/layouts/application.html.erb); then copy in the javascript bunde script element just above the closing body element in the same file.
It should looks like this:
<!DOCTYPE html>
<html>
  <head>
    <title>RailsBeginnerApp</title>
    <%= csrf_meta_tags %>
    <%= csp_meta_tag %>
    <%= stylesheet_link_tag "application", "data-turbo-track": "reload" %>
    <%= javascript_importmap_tags %>
    <link href="https://cdn.jsdelivr.net/npm/bootstrap@5.1.3/dist/css/bootstrap.min.css" rel="stylesheet" integrity="sha384-1BmE4kWBq78iYhFldvKuhfTAU6auU8tT94WrHftjDbrCEXSU1oBoqyl2QvZ6jIW3" crossorigin="anonymous">
  </head>

  <body>
    <%= yield %>
    <script src="https://cdn.jsdelivr.net/npm/bootstrap@5.1.3/dist/js/bootstrap.bundle.min.js" integrity="sha384-ka7Sk0Gln4gmtz2MlQnikT1wXgYsOg+OMhuP+IlRH9sENBO0LRn5q+8nbTov4+1p" crossorigin="anonymous"></script>
  </body>
</html>
This layout is the shell of the HTML response returned to the browser and the content of the static/index.html.erb view is injected where the yield method call happens in this layout. If that makes your head hurt thinking about it, that is ok! We'll learn more about that later.
Lastly we want to update our views/static/index.html.erb file to add some real content. I pulled the following code snippet from the Bootstrap Jumbotron example here.
Copy this into the static index view:
<main>
  <div class="container py-4">
    <div class="p-5 mb-4 bg-light rounded-3">
      <div class="container-fluid py-5">
        <h1 class="display-5 fw-bold">Ruby on Rails for Beginners</h1>
        <p class="col-md-8 fs-4">Ruby on Rails is a great framework for web development.</p>
        <button class="btn btn-primary btn-lg" type="button">Get Started</button>
      </div>
    </div>
  </div>
</main>
Now refresh your browser that is pointed to http://localhost:3000 and you should see the following HTML page:
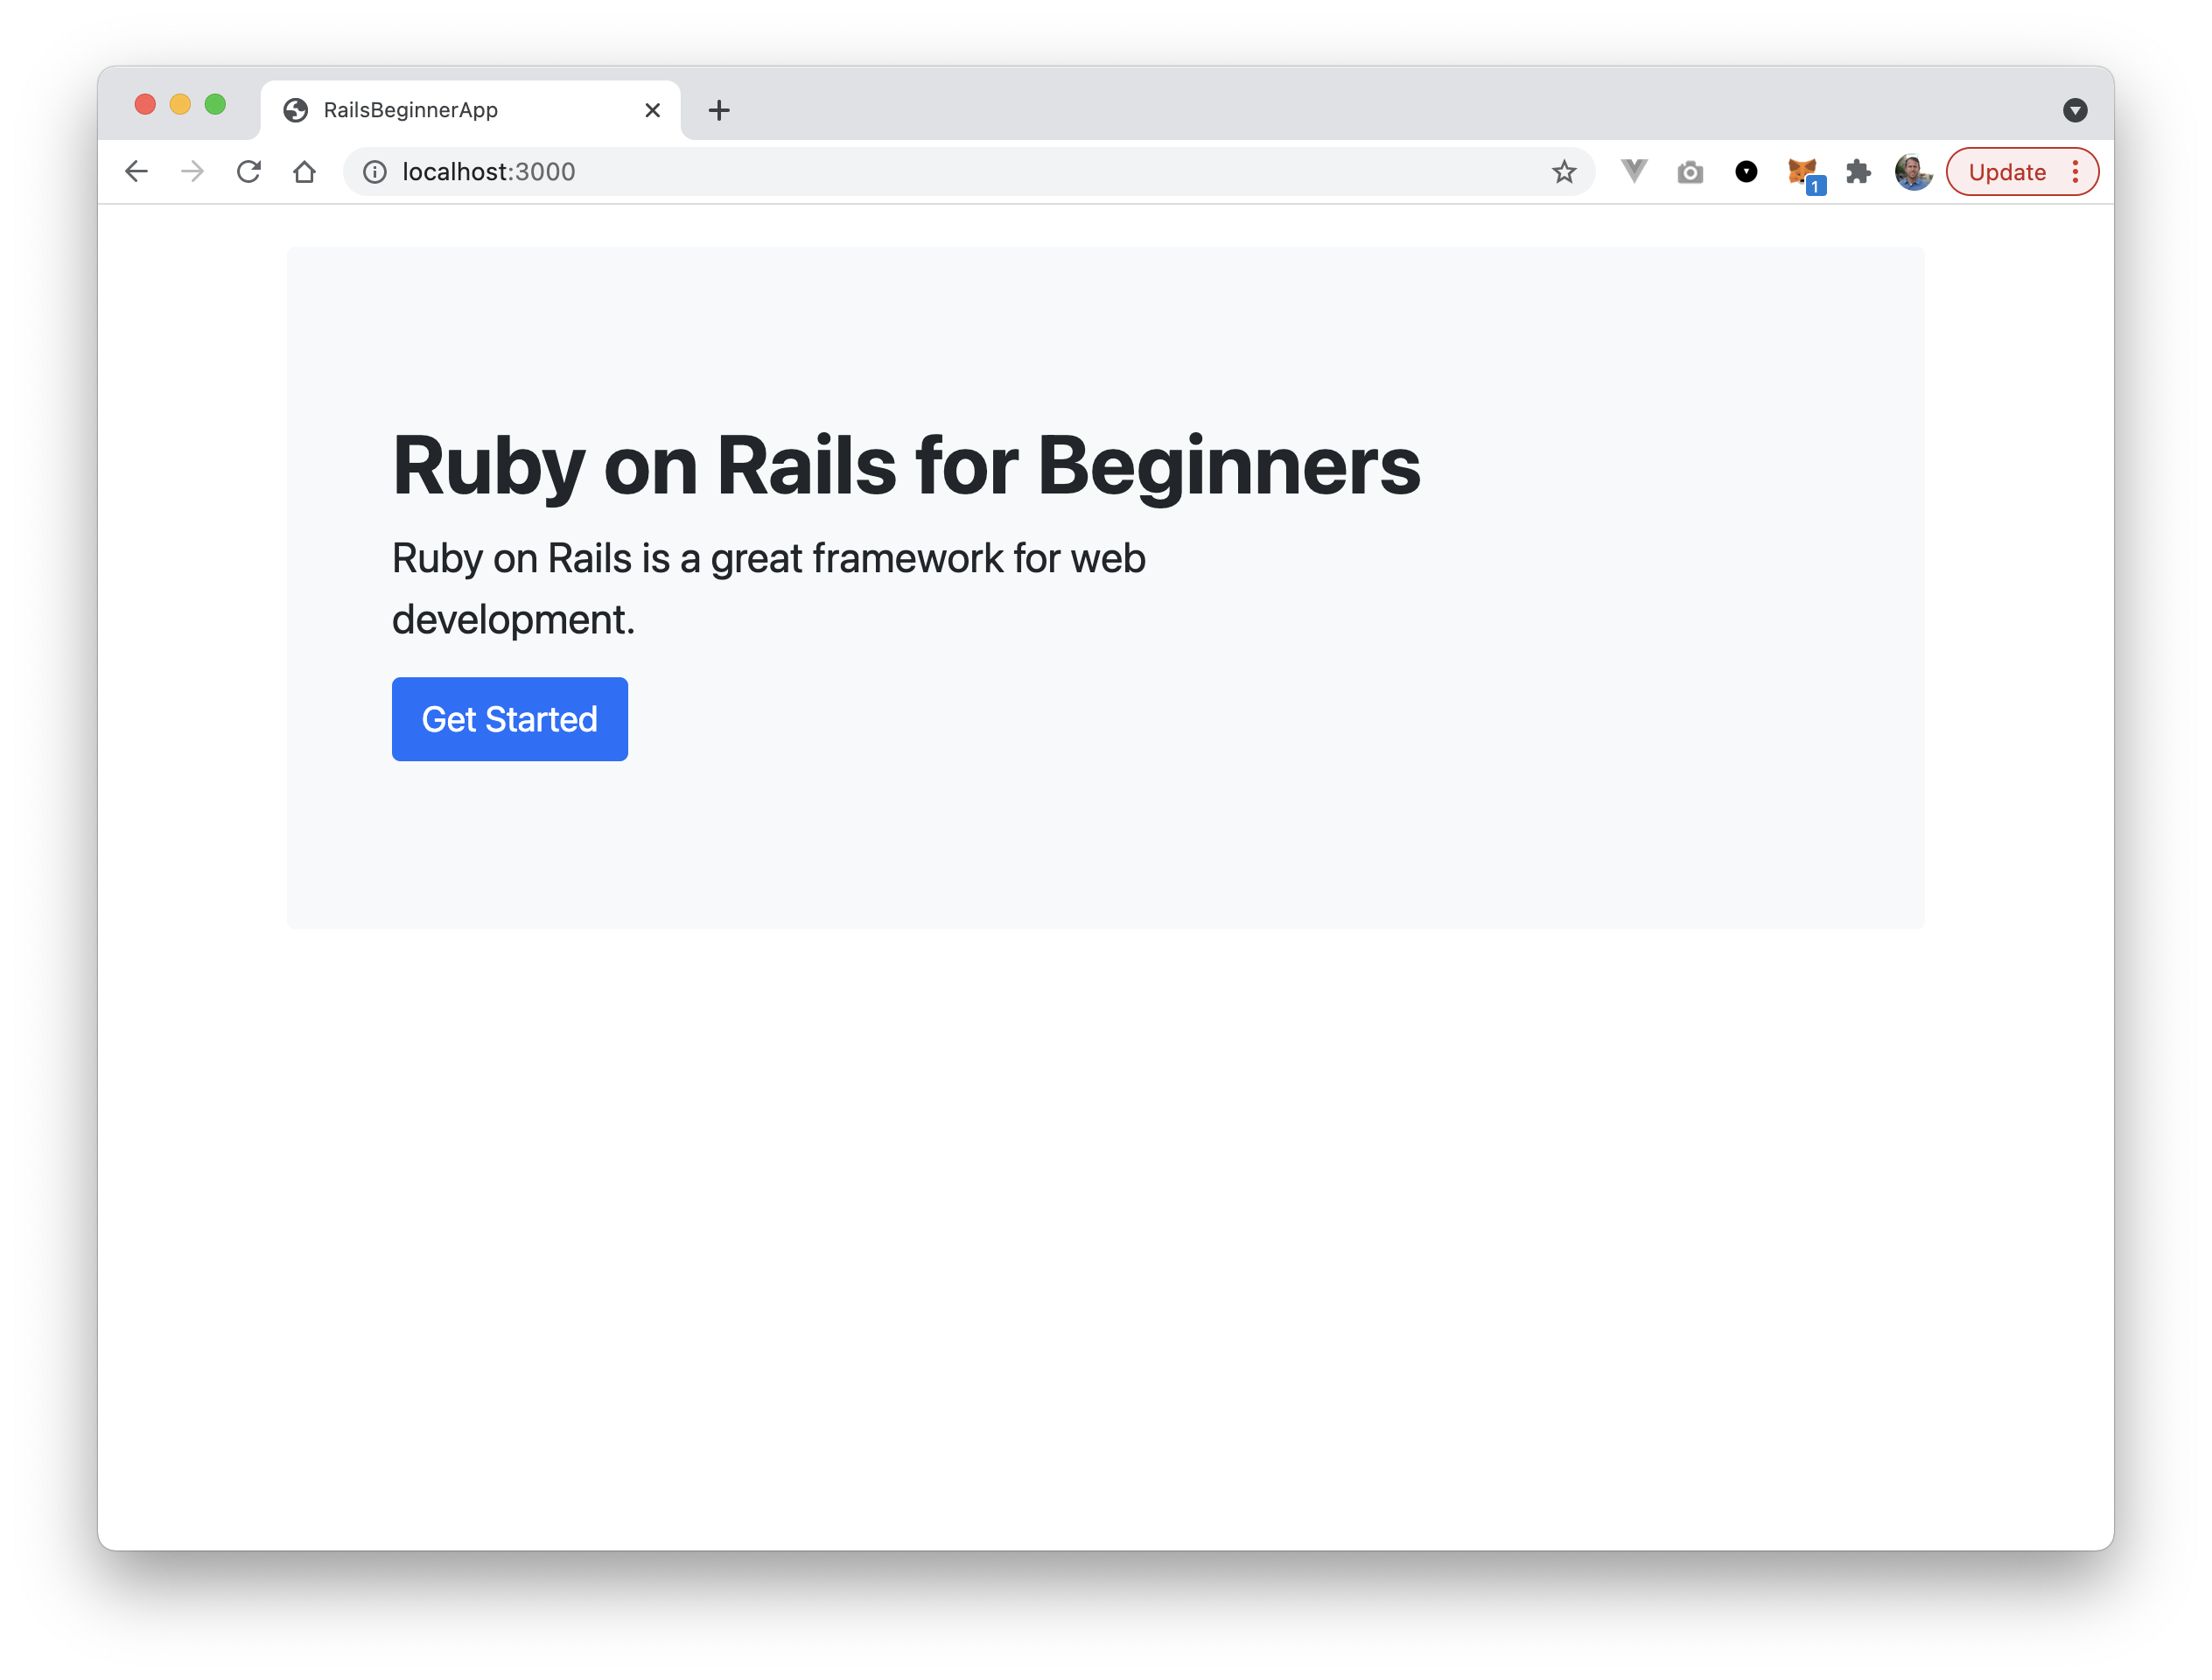
Awesome! Now we've created a brand new Rails 7 application and added a new static page to the root path!
Join me for our next lesson tomorrow where we add something new!
Happy coding!
p.s. All of the code for this course will be available in the NimbleLabs/RailsBeginnerApp GitHub repository!
